10 Dairy-Free Cupcake Recipes Kids Love
Kid-approved dairy-free cupcake recipes that deliver moist, flavorful treats for parties and allergy-safe snacking.
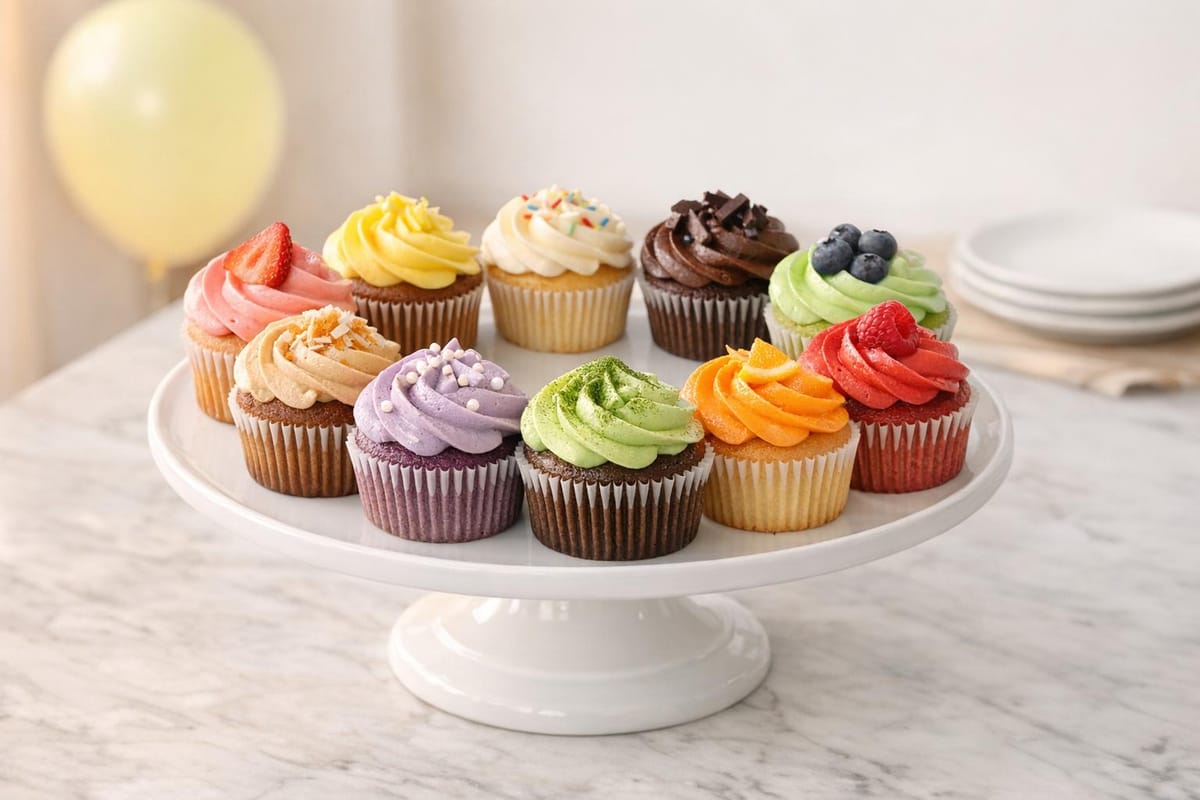
These dairy-free cupcake recipes are perfect for kids with allergies or dietary restrictions. They’re moist, fluffy, and packed with flavor, ensuring everyone can enjoy them at parties, school events, or family gatherings. From classic vanilla to chocolate, banana maple, and strawberry, these recipes are easy to make and cater to a variety of needs, including gluten-free and vegan options.
Key Highlights:
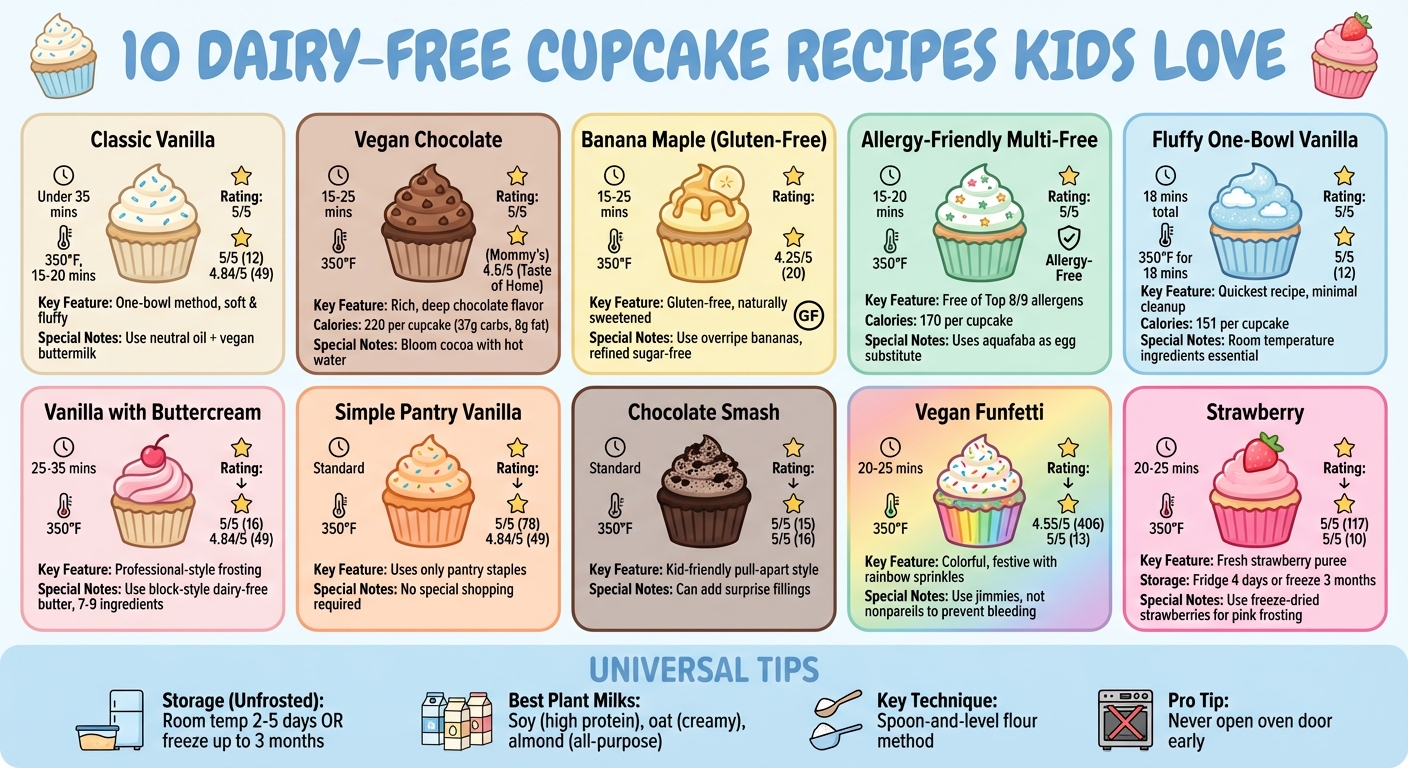
- Classic Vanilla: Soft, fluffy, and quick to make with one-bowl prep.
- Chocolate: Rich, deep flavor with pantry staples.
- Banana Maple: Gluten-free and naturally sweetened.
- Allergy-Friendly: Free of the top allergens, including dairy, eggs, and nuts.
- Funfetti: Colorful and festive with vegan sprinkles.
- Strawberry: Fresh strawberry puree for fruity bursts.
Quick Tips:
- Use plant-based milk (soy, oat, almond) with vinegar for a buttermilk effect.
- Neutral oils (canola, vegetable) keep cupcakes moist.
- Avoid overmixing to maintain a light texture.
- Store unfrosted cupcakes at room temperature for 2–5 days or freeze for up to 3 months.
Each recipe is designed to be simple, using everyday ingredients while delivering flavors kids will love.
10 Dairy-Free Cupcake Recipes for Kids: Quick Reference Guide
Gluten- and Dairy-Free Cupcakes | Baking with Kids | Recipe | Kenwood Kids Club | Episode 101

1. Classic Dairy-Free Vanilla Cupcakes
Vanilla cupcakes are a timeless treat, known for their soft texture and comforting flavor. The best part? They’re simple enough to whip up using a "one-bowl" method, making them perfect for baking with kids.
The key to achieving moist, fluffy cupcakes without dairy lies in a couple of smart swaps. Instead of butter, use a neutral oil like vegetable, canola, or sunflower oil. This ensures a soft texture that stays fresh for days. Another trick is creating a "vegan buttermilk" by mixing plant-based milk - like oat or soy - with a splash of vinegar and letting it sit for 5–10 minutes. This mixture adds moisture and helps the cupcakes rise beautifully.
"The combination of vegetable oil and dairy-free milk makes the cupcakes delightfully tall and thick, yet also light and fluffy." – Sam Adler, Pastry Chef, Frosting and Fettuccine
Bake these cupcakes at 350°F for 15–20 minutes, and you’ll have a batch ready in under 35 minutes total. To avoid dryness, use the "spoon and level" method when measuring flour, and mix the batter just until the ingredients are combined. Overmixing can lead to a dense, rubbery texture - something no one wants in a cupcake.
For an extra dose of fun, let kids get creative with toppings. Dairy-free chocolate, strawberry, or lemon frosting are all great options, or you can mix sprinkles right into the batter for a funfetti twist. These cupcakes have earned rave reviews, with one recipe scoring a perfect 5/5 from 12 ratings and another achieving 4.84/5 stars from 49 votes. Reviewers consistently praise the "perfect taste and texture".
Ready for something richer? Up next: vegan chocolate dairy-free cupcakes.
2. Vegan Chocolate Dairy-Free Cupcakes
These chocolate cupcakes take a beloved classic and make it completely vegan. Perfect for kids and adults alike, they deliver a rich, chocolatey flavor without any dairy. The best part? You probably already have most of the ingredients in your pantry: flour, unsweetened cocoa powder, sugar, neutral oil, and plant-based buttermilk (made by adding a splash of vinegar to non-dairy milk). The vinegar works with baking soda to give the cupcakes their lift, while the oil keeps them moist and tender.
For an even deeper chocolate flavor, bloom the cocoa by mixing it with boiling water or hot plant-based milk. Adding a pinch of espresso powder can also take the chocolate taste to the next level. Each unfrosted cupcake comes in at 220 calories, with 37 g of carbohydrates and 8 g of fat.
"Social events used to stress me out, but my daughter never feels left out, thanks to these cupcakes... I jazz them up with sprinkles, chocolate chips, you name it, and they steal the show every time!" – Oriana Romero, Recipe Developer and Allergy Mom
These cupcakes are a lifesaver for kids with multiple food allergies, making them ideal for school parties and birthday celebrations. To get the best results, bake them at 350°F for 15–25 minutes. Be sure to sift the flour and cocoa powder to avoid lumps, and mix the batter just until it comes together - overmixing can lead to dense, chewy cupcakes.
For some added fun, top them with dairy-free chocolate ganache, peanut butter frosting, sprinkles, mini chocolate chips, or even crushed Oreos. These recipes are crowd-pleasers, earning a 5/5 rating on Mommy's Home Cooking and a 4.5/5 rating on Taste of Home. You can also plan ahead by freezing unfrosted cupcakes for up to two months. When you're ready to serve, just thaw and decorate - they'll taste as fresh as the day you baked them.
Up next, check out a banana-inspired take on dairy-free cupcakes.
3. Gluten-Free Banana Maple Dairy-Free Cupcakes
Take your dairy-free baking game up a notch with these gluten-free banana maple cupcakes. This recipe combines the sweetness of ripe bananas with a gluten-free flour mix, nutrient-packed almond meal, and the richness of almond milk, coconut oil, and maple syrup. The result? A moist, flavorful cupcake that’s both gluten-free and vegan - perfect for parties or any occasion that calls for inclusive treats.
The secret to their incredible texture lies in a few simple tricks. First, use overripe bananas with plenty of black spots - they pack in natural sweetness and bold flavor. Since bananas vary in moisture, add the almond milk gradually to get the batter just right. The almond meal adds healthy fats and extra moisture, which is often missing in gluten-free baking, while coconut oil ensures the cupcakes stay soft and fresh for days. For the frosting, chill a can of full-fat coconut milk and whip the creamy top layer with maple syrup, lemon juice, and vanilla extract for a dairy-free "cream cheese" style topping. These small adjustments make a big difference, creating cupcakes that are irresistibly tender and satisfying.
"The vinegar is crucial as its acidity needs to react with the alkali bicarbonate of soda to make the sponge fluffy." – Rhian Williams, Founder, Rhian's Recipes
These cupcakes have earned a solid 4.25/5 star rating from 20 reviews on Rhian's Recipes, with parents raving about how much both kids and adults love them at birthday parties. They’re also refined sugar-free and can be made nut-free by swapping the almond meal for ground sunflower seeds or a touch of coconut flour - perfect for school-safe treats. For an extra pop of fun, top them with dye-free rainbow sprinkles, fresh banana slices (add these just before serving to avoid browning), or a sprinkle of cinnamon over the maple frosting.
Bake these cupcakes at 350°F for 15–25 minutes, keeping an eye on them as they bake. They’re ready when a toothpick inserted in the center comes out with a few moist crumbs, not completely clean. The banana-maple combo is a hit with kids, and the gluten-free, dairy-free recipe ensures everyone can enjoy them without a second thought.
4. Allergy-Friendly Multi-Free Dairy-Free Cupcakes
Creating safe, allergen-free cupcakes can be a real challenge, but these multi-free cupcakes manage to exclude the "Top 8" or "Top 9" common allergens - dairy, eggs, wheat, soy, peanuts, tree nuts, fish, shellfish, and sesame - while still delivering the soft, fluffy texture kids love. The secret? Smart ingredient swaps. For example, aquafaba (the liquid from canned chickpeas) works as a stand-in for eggs, providing structure. Oat or soy milk replaces dairy, and 1-to-1 gluten-free flour blends create a solid base without wheat. The result? Cupcakes that are not only safe but also delicious for kids with multiple allergies.
"The starch and protein in aquafaba make it an ideal egg substitute for making egg-free cupcakes." – Kristi Winkels, RDN, LD, Eating with Food Allergies
Nailing the right texture involves a few simple tricks. First, spoon your flour into the measuring cup to avoid dense, dry cupcakes. Shake the can of chickpeas before draining to evenly distribute the starches into the aquafaba, then whisk the liquid until it’s foamy. Want extra moisture? Try adding unsweetened applesauce or the cream portion from a can of full-fat coconut milk - this helps prevent the crumbly texture often found in allergy-friendly baked goods. Parents have given these cupcakes glowing 5/5 ratings, thrilled their kids can finally enjoy birthday treats without worry. Just remember, double-check every ingredient to ensure it’s free from allergens.
Cross-contamination is a big concern when baking for those with multiple allergies. Always verify labels for allergen traces - some ingredients, like cocoa powder, might contain dairy. To keep things festive, decorate with natural food dyes from brands like Color Kitchen and top with vegan sprinkles free of artificial dyes. These small touches make the cupcakes just as fun as traditional ones.
Bake these at 350°F for 15–20 minutes, and check for doneness with a toothpick - look for moist crumbs rather than a completely clean center. At just 170 calories per cupcake, they’re a lighter treat that doesn’t skimp on flavor. The best part? Kids won’t even realize they’re eating allergen-free cupcakes - they’ll just enjoy the vanilla sweetness and fluffy texture they crave.
5. Fluffy One-Bowl Dairy-Free Vanilla Cupcakes
If you’re looking for a dessert that’s quick to make and easy to clean up, these one-bowl dairy-free vanilla cupcakes are a game-changer. Forget the usual hassle of creaming butter and sugar in separate bowls. Here, you simply whisk together the dry ingredients - flour, sugar, baking powder, and salt - in one large bowl. Then, add the wet ingredients (dairy-free milk, vegetable oil, vanilla, and either an egg or a flax egg) directly into the same bowl. Pop them in the oven at 350°F, and in just 18 minutes, you’ll have cupcakes that are tall, fluffy, and irresistibly light.
The key to achieving that perfect texture lies in a few small but important steps. First, measure your flour using the spoon-and-level method to avoid packing it too tightly, which can lead to dense cupcakes. Second, make sure all your wet ingredients are at room temperature - this helps them blend smoothly and prevents a rubbery texture. Finally, mix the batter just until it’s smooth. Overmixing can lead to a tougher crumb, which is the opposite of what you want in a cupcake.
For the dairy-free milk, oat milk works wonderfully for a creamy texture, but soy, almond, rice, or coconut milk are excellent alternatives too. If you’re making a vegan batch, swap the egg for a flax egg (just mix 1 tablespoon of flaxseed meal with 3 tablespoons of water and let it sit until it thickens). These cupcakes are not only easy to prepare but also crowd-pleasers, with each cupcake coming in at about 151 calories. They’ve even earned a perfect 5/5 star rating from 12 community reviews! With this recipe, you can whip up a dozen cupcakes in no time - just 18 minutes from start to finish.
6. Soft Dairy-Free Vanilla Cupcakes with Buttercream
This recipe brings together soft, fluffy vanilla cupcakes and a creamy, dairy-free buttercream. The secret to their success lies in creating a vegan buttermilk. High-protein plant-based milks, like soy or pea, work best because they thicken more noticeably when curdled, giving the cupcakes better structure compared to almond or oat milk. To make it, simply mix plant-based milk with a tablespoon of vinegar. This combination reacts with baking soda to create the lift you need for light, airy cupcakes.
The type of fat you use is just as important. Instead of dairy-free butter, opt for a neutral oil like vegetable, canola, or melted coconut oil. Laura Schneider, Founder of Friendly Vegan Kitchen, emphasizes:
"Using a neutral flavored oil makes for a no-fail cupcake that has a light texture, and stays moist for days".
For the perfect crumb, use cake or self-raising flour. This ensures a delicate, springy texture that pairs beautifully with the whipped buttercream. These cupcakes come together quickly, requiring just 7 to 9 pantry staples, and are ready in about 25 to 35 minutes.
Once the cupcakes are baked to perfection, it’s time to whip up the dairy-free buttercream. The choice of ingredients here is crucial. Block-style dairy-free butter, such as Earth Balance or Miyoko's, is ideal because its lower water content makes for a more stable and less greasy frosting. Professional baker Angela from Bake Angel explains:
"I also highly recommend using a block butter, not a spreadable version, as block butter reacts better in baking, has a lower water content, and a less greasy consistency".
To achieve a light and fluffy buttercream, sift your powdered sugar first, then beat the frosting on medium-high speed for 3–5 minutes. If the consistency feels too thick, add oat milk one tablespoon at a time - oat milk gives a wonderfully creamy texture.
This recipe has received glowing reviews, with a 5/5 rating from 16 votes on Bake Angel and a 4.84/5 from 49 votes on Make It Dairy Free. A couple of tips to ensure success: let your dairy-free butter soften (but don’t melt it) before mixing, and resist the urge to open the oven door during the first 19 minutes of baking to prevent the cupcakes from deflating. With these techniques, you’ll create cupcakes that stay moist and buttercream that pipes effortlessly into beautiful swirls.
7. Simple Pantry Dairy-Free Vanilla Cupcakes
Need cupcakes but don't feel like heading to the store? This recipe is perfect for those moments, using pantry staples like all-purpose flour, granulated sugar, baking powder, baking soda, salt, vegetable oil, vanilla extract, and water or non-dairy milk to whip up a batch of delicious dairy-free treats. With ingredients you likely already have, it’s an easy way to make cupcakes without the hassle of extra shopping. Plus, there's a clever twist for preparing dairy-free buttermilk to enhance the recipe.
To create dairy-free buttermilk, simply mix non-dairy milk with vinegar and let it sit for 5–10 minutes. This reaction activates the baking soda, ensuring your cupcakes rise beautifully and have that light, fluffy texture everyone loves.
Pro tip: When measuring flour, fluff it with a fork, spoon it into your measuring cup, and level it off with a knife. This prevents the flour from packing too densely, which can affect the texture of your cupcakes.
These recipes are fan favorites, with one version rated 5/5 by 78 voters and another scoring 4.84/5 from 49 voters. Using a neutral oil, like canola or vegetable oil, ensures the cupcakes stay moist for days - perfect for making ahead or enjoying leftovers.
8. Kid-Favorite Dairy-Free Chocolate Smash Cupcakes
These cupcakes are made with little hands in mind, perfect for kids to pull apart and enjoy. Inspired by the "smash cakes" often used for first birthdays, these cupcakes bring that same playful concept to a smaller, more manageable treat.
The cupcake base combines simple pantry staples: all-purpose flour, granulated sugar, unsweetened cocoa powder, baking soda, and salt. A neutral oil, like vegetable, canola, or avocado oil, ties it all together. To deepen the chocolate flavor, try mixing the cocoa powder with hot water or even coffee - it makes a noticeable difference. Dairy-free buttermilk is the secret to achieving that soft, spongy texture. Once baked, these cupcakes are a blank canvas, ready for frosting and fillings.
"These are purely magical! These taste like everything I've been missing in vegan baked goods. I love how the chocolate flavor is perfect - not too strong but also the perfect sweetness." - Megan, Verified Reviewer
For a fun surprise, you can fill the center with a creamy mix of sunflower seed butter and dairy-free coconut whipped topping, or press a mini dairy-free chocolate bar into the frosting for an extra treat. The frosting itself is a breeze to make - just blend dairy-free butter, powdered sugar, cocoa powder, and a splash of oat or almond milk until it’s light and fluffy. Finish them off with mini chocolate chips, shredded coconut, or colorful sprinkles for a festive touch.
These cupcakes are a hit with reviewers. One version holds a perfect 5/5 stars from 15 votes, while another boasts the same rating from 16 reviews. Pro tip: only fill your cupcake liners halfway to three-quarters full to avoid messy spills, and let the cupcakes cool completely before frosting to keep the buttercream from melting.
9. Easy Vegan Dairy-Free Funfetti Cupcakes
These vegan funfetti cupcakes bring a burst of color and festive vibes to any celebration. The recipe is straightforward: mix together all-purpose flour, granulated sugar, baking powder, baking soda, and salt. Then, add non-dairy milk (like soy, almond, or oat), a neutral oil (such as canola or avocado), and vanilla extract. To achieve the light, fluffy texture, combine non-dairy milk with apple cider vinegar or lemon juice and let it sit for 5–10 minutes. This creates a vegan buttermilk that works wonders for leavening. The final touch? Perfectly timing the sprinkles for that classic funfetti look.
The key to vibrant sprinkles that don’t bleed lies in selecting the right type. Opt for rainbow jimmies, as they hold their color during baking, unlike nonpareils, which tend to bleed. As Alison Andrews from Loving It Vegan explains:
"It's crucial to use the right sprinkles for funfetti cakes and cupcakes and the right kind of sprinkles are rainbow sprinkles or 'jimmies'".
Make sure to check the labels, though, since some sprinkles contain confectioner's glaze or non-vegan dyes.
When it comes to adding sprinkles, timing is everything. Gently fold them into the batter with a spatula once it’s smooth. If you’re substituting melted vegan butter for oil, let it cool to room temperature first to avoid causing the sprinkles to bleed. Once mixed, stop stirring immediately to keep the colors intact.
Pour the batter into cupcake liners, filling each about 3/4 full. Bake at 350°F for 20–25 minutes, or until a toothpick inserted into the center comes out clean. These cupcakes have received glowing reviews, with a 4.55/5 rating from 406 votes on Minimalist Baker and a perfect 5/5 from 13 votes on Loving It Vegan. Let them cool completely on a wire rack before adding your favorite frosting.
10. Moist Dairy-Free Strawberry Cupcakes
These strawberry cupcakes are the perfect way to add a fruity twist to your dairy-free dessert lineup. The secret? Fresh strawberry puree mixed right into the batter, along with diced strawberries for delicious bursts of flavor in every bite. This approach lets the strawberries shine, making these cupcakes stand out from the more classic flavors we’ve covered so far. Want an extra touch of softness? Stir in a tablespoon of strawberry jam - it’s a natural way to keep your cupcakes moist and tender.
The base for any moist dairy-free cupcake starts with vegan buttermilk. To make it, mix your favorite plant-based milk with a splash of apple cider vinegar or lemon juice, then let it sit for 5–10 minutes. This simple step adds acidity, which helps create a soft, fluffy crumb. Stick to neutral oils like sunflower, canola, or avocado to keep the texture light and moist. As Carine Claudepierre from The Conscious Plant Kitchen explains:
"Strawberry cupcakes differ from other cupcakes in that they incorporate strawberry puree, which can upset the balance of your batter if it's not done properly."
For an even airier texture, replace a portion of your all-purpose flour with cake flour, which has a lower protein content. Dice your strawberries evenly so they don’t sink to the bottom, and if you’re using frozen berries, make sure they’re fully thawed and drained to avoid adding extra liquid to the batter.
Bake at 350°F for 20–25 minutes, or until the centers spring back when lightly pressed. These recipes are crowd favorites - Food Sharing Vegan’s one-bowl version boasts a perfect 5/5 rating from 117 votes, while The Conscious Plant Kitchen’s strawberry puree recipe has also earned a flawless 5/5 from 10 reviewers.
For the frosting, try blending freeze-dried strawberries into a fine powder. It’s an easy, natural way to give your buttercream a pink hue without resorting to artificial dyes. Store your finished cupcakes in an airtight container in the fridge for up to four days, or freeze them (unfrosted) for up to three months.
Tips for Perfect Dairy-Free Cupcakes
Making dairy-free cupcakes that are moist and delicious comes down to a few essential techniques. Start by bringing all your ingredients to room temperature - this ensures a smoother batter. When measuring dry ingredients, use the spoon-and-level method to avoid packing too much into your measuring cups, which can lead to dense or dry cupcakes.
Once you’ve nailed the basics, it’s time to focus on ingredients. Selecting the right dairy-free milk can make all the difference. Soy milk is a great choice because its protein content allows it to curdle well, oat milk adds a creamy texture, and almond milk is a dependable all-around option. Sharon Best highlights the magic of soy milk and vinegar:
"The acid in the vinegar quickly curdles the proteins in the soy milk, creating a tangy, thickened mixture similar to buttermilk. This mixture not only helps bind the cupcake batter, but its acidity also reacts with the baking powder to create bubbles, boosting lift and tenderness."
When it’s time to portion the batter, a 3-tablespoon cookie scoop works perfectly. Fill liners about 2/3 to 3/4 full to give the cupcakes enough room to rise without overflowing. And here’s a key tip: don’t open the oven door while they’re baking! Doing so too early can cause the centers to sink.
After baking, proper cooling and storage are crucial for keeping your cupcakes fresh. Let them cool completely on a wire rack for at least an hour before storing. If they’re unfrosted, you can keep them at room temperature in an airtight container for 2–5 days. Avoid the fridge - it speeds up staling by crystallizing the sugar and flour. For longer storage, freeze them for up to 3 months. If your cupcakes are frosted, quick-freeze them on a baking sheet for 15–60 minutes, then wrap them individually before placing them in a freezer-safe bag.
Conclusion
From classic vanilla and rich chocolate to festive funfetti and fruity strawberry, these dairy-free cupcake recipes bring flavor and inclusivity to the table. Whether you're planning a birthday bash, packing school snacks, or looking for a fun weekend baking project, these 10 recipes prove that kids can enjoy delicious, fluffy, and moist cupcakes - without any dairy.
These recipes go beyond just flavor; they cater to a variety of dietary needs. Many are designed to be free of multiple allergens, excluding not just dairy but also eggs, gluten, and nuts. This makes them a perfect choice for school parties or any gathering where dietary restrictions are a concern. As Stacey from My Kids Lick The Bowl shares:
"Birthdays and special treats like cupcakes should be something everyone enjoys... making them absolutely perfect for birthday parties where there may be children with food allergies."
The rave reviews speak for themselves. Ratings from trusted sources like Yummy Toddler Food (4.97/5 from 204 votes) and Chelsweets (4.9/5 from 97 ratings) highlight that these cupcakes are so good, no one will miss the traditional ingredients.
Preparation is a breeze, too. You can bake a batch in advance and store them in an airtight container for up to 2 days or freeze them for up to 3 months, so you're always ready for any celebration. With simple swaps like almond milk, applesauce, or plant-based butter, it's easy to tweak these recipes to suit your child's tastes or dietary needs. These aren't just substitutes - they're treats kids genuinely enjoy.
FAQs
How can I make dairy-free cupcakes safe for kids with other allergies?
If you’re making dairy-free cupcakes for kids with multiple allergies, it’s essential to choose ingredients that also steer clear of common allergens like gluten, nuts, and eggs. Swap regular milk for plant-based alternatives such as oat, soy, or coconut milk. To replace eggs, try using applesauce or dairy-free yogurt - these options work great for both vegan and egg-free recipes.
For gluten-free baking, go with flours like rice flour or a gluten-free all-purpose blend. And if nut allergies are a concern, it’s best to skip nuts entirely. Be sure to read ingredient labels carefully to avoid any cross-contamination or hidden allergens. With thoughtful substitutions, you can whip up cupcakes that are not only tasty but also safe and inclusive for everyone to enjoy.
What are the best dairy-free milk options for baking cupcakes?
When it comes to baking cupcakes, soy milk and oat milk stand out as two of the top dairy-free alternatives. Soy milk is an excellent option because its protein content closely resembles that of cow's milk. This helps your cupcakes rise beautifully and keeps their texture soft and tender. Meanwhile, oat milk, with its creamy texture and mild taste, blends seamlessly into cupcake recipes.
If you're looking to experiment, almond milk, coconut milk, and cashew milk can bring distinct flavors to your cupcakes. However, soy and oat milk tend to be the most dependable and versatile choices for baking. Whichever plant-based milk you choose, make sure it has a smooth consistency to ensure your cupcakes turn out just right.
What’s the best way to store dairy-free cupcakes so they stay fresh?
To keep your dairy-free cupcakes fresh, store unfrosted ones in an airtight container at room temperature for up to 2–4 days. If they’re frosted, place them in the fridge in an airtight container, and before serving, let them sit out for about 30 minutes so the frosting softens up a bit.
Need to store them longer? Unfrosted cupcakes freeze well in a freezer-safe container or bag. Frosted cupcakes can be frozen too - just make sure they’re wrapped carefully to protect the frosting. When it’s time to enjoy them, allow them to thaw at room temperature for the best flavor and texture.