5 Almond Milk Ice Cream Recipes
Explore five delicious almond milk ice cream recipes that are dairy-free, healthy, and easy to customize for your cravings.
Craving ice cream but avoiding dairy? Almond milk ice cream is the perfect solution. It's lactose-free, lower in calories, and packed with plant-based nutrients like vitamin E and magnesium. Whether you're vegan, lactose-intolerant, or just want a healthier dessert option, these 5 recipes deliver creamy, delicious flavors without the dairy.
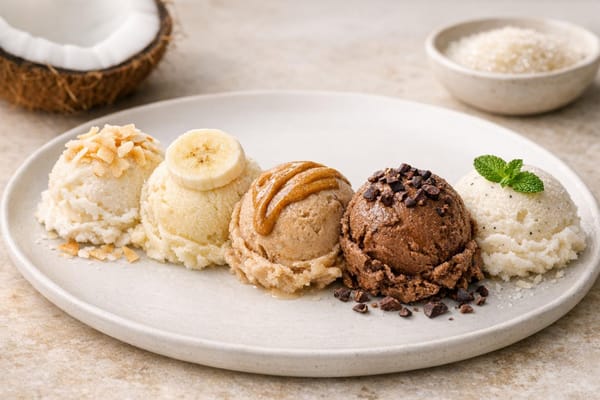
Here's a quick look at the recipes:
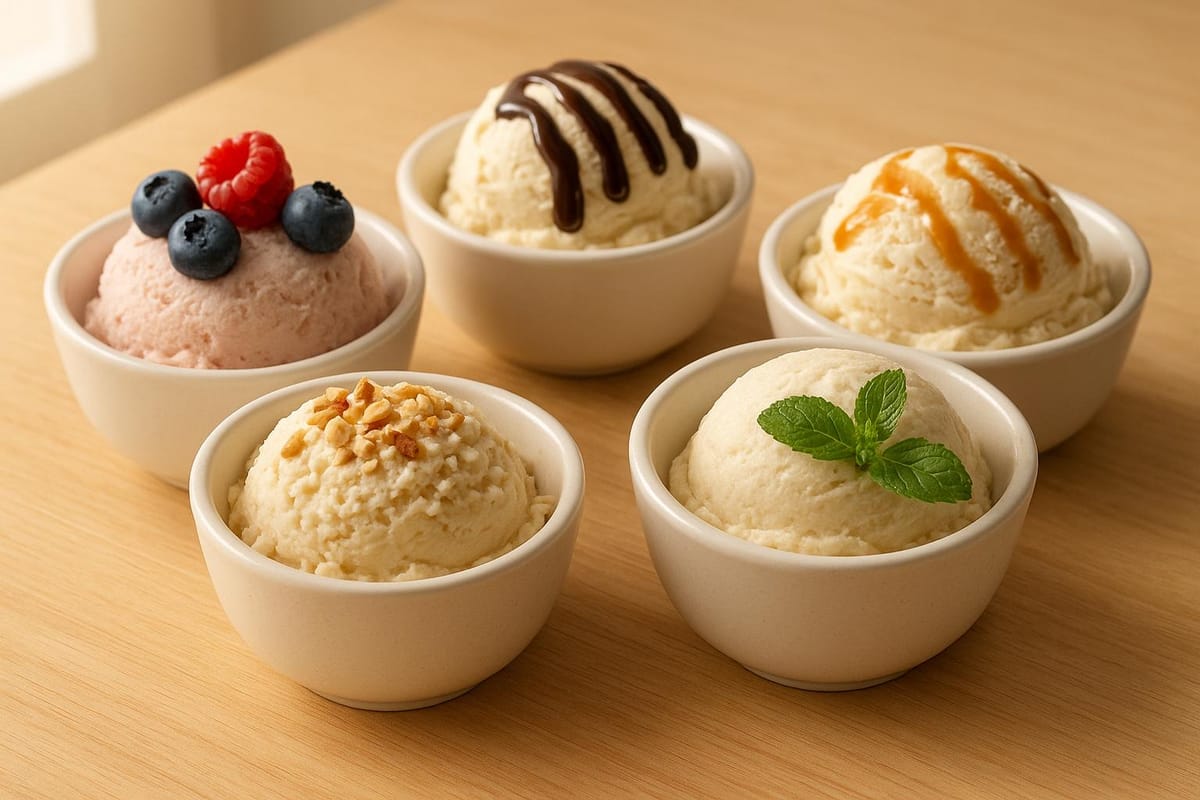
- Classic Vanilla: Simple, smooth, and lightly sweet.
- Chocolate: Rich cocoa flavor with a creamy texture.
- Berry Swirl: Fruity, tangy, and visually stunning.
- Nutty Caramel: Sweet caramel with crunchy nuts.
- Mocha: Bold coffee and chocolate combo.
Quick Comparison of Recipes
| Recipe | Prep Time | Ingredients | Flavor Profile | Texture | Difficulty |
|---|---|---|---|---|---|
| Classic Vanilla | 15 mins | 6 | Mild, sweet, nutty | Smooth, creamy | Easy |
| Chocolate | 20 mins | 7 | Rich, cocoa-forward | Dense, creamy | Easy |
| Berry Swirl | 35 mins | 9 | Fruity, tart-sweet | Light, swirled | Moderate |
| Nutty Caramel | 45 mins | 11 | Sweet, nutty, rich | Chunky, indulgent | Advanced |
| Mocha | 25 mins | 8 | Bold coffee-chocolate | Smooth, intense | Moderate |
Each recipe is customizable, easy to make at home, and uses simple ingredients like almond milk, coconut milk, and natural sweeteners. Whether you're a beginner or an experienced home chef, there's a recipe here for everyone. Keep reading to learn how to make these dairy-free frozen treats!
Almond Milk Ice Cream | 4-ingredient, dairy-free ice cream
Tips for Making Almond Milk Ice Cream
Almond milk has a lighter texture compared to dairy, which means nailing the right balance of sweetness and flavor is key. Here’s how to make the most of it.
Choose the Right Almond Milk
- Unsweetened almond milk: This gives you full control over the sweetness and avoids unnecessary additives.
- Unsweetened vanilla almond milk: Adds a hint of vanilla without needing extra extract.
- Plain almond milk: Perfect if you want to customize with your own vanilla or sweeteners.
Keep in mind, almond milk tends to create a sweeter and thinner texture compared to traditional dairy. If you prefer a creamier result, try using an almond-cashew blend for added richness.
Recipe 1: Classic Vanilla Almond Milk Ice Cream
This recipe delivers a smooth and creamy vanilla ice cream, ideal for anyone steering clear of dairy.
Ingredients and Preparation
Ingredients:
- 2 cups unsweetened almond milk
- 1/2 cup of your preferred sweetener (granulated sugar works great, or opt for stevia, monk fruit, or allulose for a low-carb option)
- 2 teaspoons pure vanilla extract
- A pinch of sea salt
For an extra creamy texture, you can include 1 large egg yolk. To temper the yolk, beat it in a bowl and slowly whisk in 1/2 cup of warm almond milk. Once mixed, combine it with the remaining ingredients and strain for a smoother consistency.
In a bowl, whisk all the ingredients together until the sweetener is fully dissolved. Chill the mixture in the refrigerator for at least 2 hours or until it reaches about 40°F.
When ready, pour the chilled mixture into your ice cream maker and churn according to the manufacturer's instructions (usually 20–25 minutes). If you don’t have an ice cream maker, freeze the mixture in a container, stirring every 30 minutes for the first 4–6 hours to prevent ice crystals from forming.
Optional Add-Ins for Better Texture
If you want softer, easier-to-scoop ice cream, try adding 1 tablespoon of vodka to the mix before churning. The alcohol helps keep the ice cream from freezing too solid. Another option is to include a small pinch of xanthan gum or guar gum, which reduces ice crystal formation and enhances the texture.
Maya Krampf from Wholesome Yum suggests using Besti Powdered Monk Fruit Allulose Blend as a sweetener. It dissolves effortlessly and has a zero glycemic index, making it a fantastic choice for anyone monitoring their blood sugar levels.
Recipe 2: Chocolate Almond Milk Ice Cream
Who says dairy-free desserts can't be indulgent? This chocolate almond milk ice cream is proof that you can enjoy a rich, creamy treat without the dairy. It's a luscious alternative that holds its own against any traditional ice cream shop creation.
Ingredients and Preparation
What You’ll Need:
- 2 cups unsweetened almond milk
- 1/2 cup full-fat canned coconut milk (for added creaminess)
- 1/3 cup unsweetened cocoa powder
- 1/2 cup granulated sugar (or your preferred sweetener)
- 2 tablespoons raw cashew butter
- 1 teaspoon vanilla extract
- A pinch of sea salt
- A small pinch of xanthan gum (optional, for smoother texture)
Almond milk's subtle nuttiness pairs beautifully with the deep chocolate flavors, while coconut milk brings that velvety texture we all crave. The addition of cashew butter and a touch of sea salt ties everything together, creating a dessert that's both indulgent and satisfying.
Step-by-Step Instructions:
- Start by whisking the cocoa powder with 1/2 cup of almond milk. Warm this mixture over medium heat for about 3–4 minutes, stirring until the cocoa dissolves completely. This step ensures the chocolate flavor is evenly distributed.
- In a large mixing bowl, combine the remaining almond milk, coconut milk, sugar, cashew butter, vanilla extract, and sea salt. Whisk until the mixture is smooth and creamy.
- Add the warm cocoa-almond milk mixture to the bowl and whisk again until everything is fully blended.
- Chill the mixture in the refrigerator for at least 3 hours, or until it reaches about 40°F. This chilling step enhances the flavor and ensures the ice cream churns properly.
- Pour the chilled mixture into your ice cream maker and churn according to the manufacturer's instructions (usually 20–25 minutes). If you don’t have an ice cream maker, pour the mixture into a freezer-safe container and stir it every 30 minutes for 4–6 hours to create a creamy consistency.
Enhancing Flavor and Texture
Want to take your ice cream to the next level? Here are some tips to make it even better:
- Boost the Chocolate Factor: Replace half the cocoa powder with 2 oz of melted dairy-free dark chocolate for a richer, more intense chocolate flavor.
- Keep It Creamy: The combination of cocoa and cashew butter helps reduce ice crystals, ensuring a smooth texture.
- Perfect the Scoop: Let the ice cream sit at room temperature for 10–15 minutes before serving. This softens it just enough to make scooping a breeze.
For those who love mix-ins, the possibilities are endless. Swirl in peanut butter, crumble in Oreo Thins, or toss in chunks of peanut butter cups during the last 2–3 minutes of churning. These additions add fun textures and flavors, making your homemade ice cream feel extra special.
With its creamy texture and bold chocolate flavor, this dairy-free dessert is sure to impress - even the most die-hard ice cream lovers. Coconut milk, cashew butter, and cocoa come together to create a treat that's indulgent, satisfying, and completely dairy-free.
Recipe 3: Berry Swirl Almond Milk Ice Cream
Berry swirl ice cream is like a bite of summer, packed with the vibrant, fruity goodness of fresh berries. This recipe turns simple almond milk into a creamy, refreshing dessert that’s as stunning to look at as it is to eat. The tangy sweetness of berries pairs perfectly with the smooth almond base, making it a light yet satisfying treat. It’s a fun way to expand your collection of almond milk ice cream flavors.
"I call for strawberries, here, but you can use raspberries, blueberries, blackberries, or a blend! I love the bright intensity of the strawberry though." – Heidi Swanson
Ingredients for the Ice Cream Base
- 2 cups unsweetened almond milk
- 1/2 cup full-fat canned coconut milk
- 1/2 cup granulated sugar
- 2 tablespoons cashew butter
- 1 teaspoon vanilla extract
- 1/4 teaspoon xanthan gum (optional)
- Pinch of sea salt
This recipe is all about flexibility. While strawberries are a classic choice, feel free to experiment with raspberries, blueberries, blackberries, or even a mix. Fresh berries are ideal, but frozen ones work just as well - and they’re often easier on the wallet.
Making the Ice Cream Base
Start by whisking all the base ingredients together until smooth. The cashew butter is the secret to a creamy texture, helping to reduce ice crystals. Chill the mixture in the fridge for at least 3 hours, ensuring it reaches around 40°F. Once it’s cold, churn the mixture in your ice cream maker for 20-25 minutes, following the manufacturer’s instructions.
Just like with classic and chocolate almond milk ice cream, a smooth base is the foundation for success.
Berry Compote: Flavor and Texture Booster
A berry compote adds a concentrated burst of flavor and ensures the swirls stay smooth and rich, even when frozen. It’s essentially a quick, chunky fruit sauce that’s easy to whip up.
"A compote is a quick and chunky fruit sauce that can be made in minutes on the stovetop. The heat breaks down the fruits, creating a wonderfully thick yet juicy sauce." – Alphafoodie
Ingredients for the Berry Compote:
- 2 cups mixed berries (fresh or frozen)
- 1/3 cup granulated sugar
- 2 tablespoons fresh lemon juice
- 1 tablespoon water (if using fresh berries)
How to Make the Compote:
- Combine the berries, sugar, and lemon juice in a medium saucepan. If you’re using fresh berries, add the water to help them release their juices.
- Simmer the mixture for 7–10 minutes, stirring frequently to prevent sticking. Mash about half the berries to create a chunky texture.
- For a smoother swirl, strain the mixture through a fine-mesh sieve to remove seeds.
- Let the compote cool to room temperature, then refrigerate it for at least 2 hours. This step is crucial - adding hot compote to your ice cream will ruin its texture.
Swirling for a Picture-Perfect Dessert
Creating those gorgeous berry swirls is all about layering and technique. The key is to balance the textures of the ice cream and compote while keeping the flavors distinct.
"Not only will this ensure the ribbon in your ice cream is saucy and smooth when frozen, it also gives it a thick-bodied consistency that makes it easier to swirl in the first place." – Stella Parks, Editor Emeritus at Serious Eats
How to Layer and Swirl:
- Spread one-third of your freshly churned ice cream into a chilled, freezer-safe container.
- Drizzle the cooled berry compote over the ice cream, creating random ribbons with a spoon or squeeze bottle.
- Repeat the process with another layer of ice cream and compote, finishing with a final layer of ice cream.
To achieve perfect swirls, gently drag a butter knife or thin spatula through the layers in vertical and horizontal motions. Be careful not to over-mix, as this can blur the vibrant colors and dilute the berry flavor.
Tips for the Best Results
- Use a clear glass container to showcase the beautiful swirls.
- Cover the container tightly and freeze for at least 4 hours before serving.
- Let the ice cream soften at room temperature for 10-15 minutes before scooping. Each serving will reveal its own unique swirl pattern, adding to the charm of this dessert.
This berry swirl almond milk ice cream proves that going dairy-free doesn’t mean giving up on indulgence. The tartness of the berries perfectly balances the creamy almond base, making every bite a delightful mix of flavors and textures.
Recipe 4: Nutty Caramel Almond Milk Ice Cream
This recipe takes the creamy almond milk base to the next level by introducing caramel and nuts. Nutty caramel almond milk ice cream is a dairy-free delight that blends the buttery sweetness of caramel with the crunch of toasted almonds and pecans. The result? A dessert that’s rich in flavor and texture, perfect for satisfying your sweet tooth.
The combination of caramel’s smooth sweetness and the nutty crunch creates a balance that’s hard to resist. Unlike traditional caramel ice cream, this version skips the heavy cream and butter, relying instead on coconut milk and other plant-based ingredients for that indulgent texture.
Ingredients for the Ice Cream Base:
- 2 cups unsweetened almond milk
- 1/2 cup full-fat canned coconut milk
- 1/2 cup granulated sugar
- 2 tablespoons almond butter
- 1 teaspoon vanilla extract
- 1/4 teaspoon xanthan gum (optional)
- Pinch of sea salt
Start by whisking all the base ingredients together until the mixture is silky smooth. The almond butter not only adds a layer of richness but also helps reduce the formation of ice crystals. Once combined, chill the mixture for at least 3 hours, ensuring it reaches about 40°F. Then, churn it in your ice cream maker for 20–25 minutes, following the manufacturer’s instructions. While the base churns, it’s time to prepare the caramel sauce.
Crafting the Caramel Sauce
The secret to a standout caramel ice cream lies in a caramel sauce that stays smooth and ribbon-like, even when frozen. While store-bought options work, making your own ensures you can tweak the sweetness and texture to your liking.
This dairy-free caramel recipe is a go-to favorite for many!
Simple Dairy-Free Caramel Recipe:
In a medium saucepan, combine:
- 1 cup packed light brown sugar
- 4 tablespoons vegan butter
- 1/2 teaspoon salt
- 1/2 cup full-fat coconut milk
Simmer the mixture over low heat for 8–10 minutes, whisking constantly, until it thickens slightly. Remove from heat and stir in 1 tablespoon of vanilla extract. Let the caramel cool completely before using - it’s essential for achieving the perfect consistency.
Adding a Nutty Crunch
Once your caramel is ready, it’s time to add the crunch factor with toasted nuts. Almonds and pecans are ideal, offering a mix of delicate sweetness and buttery richness that complements the caramel beautifully.
Preparing the Nuts:
Toast 1/2 cup sliced almonds and 1/2 cup chopped pecans in a dry skillet over medium heat for 3–4 minutes, stirring frequently, until golden and fragrant. Let them cool completely before incorporating them into the ice cream.
Almonds provide a light, crisp crunch, while pecans bring a deeper, buttery flavor. Feel free to adjust the ratio to suit your taste.
Assembling the Ice Cream
With all the components ready, it’s time to bring everything together. Work quickly to preserve the ice cream’s texture during assembly.
- Spread one-third of the churned ice cream into a chilled container.
- Drizzle a generous amount of the cooled caramel sauce over the layer.
- Sprinkle with a handful of the toasted nuts.
Repeat this layering process until all the ingredients are used, finishing with a layer of ice cream on top. Gently fold the caramel and nuts into the ice cream to create ribbons of caramel and pockets of crunchy goodness.
Cover the container tightly and freeze for at least 4 hours before serving. The final product is a sophisticated dessert where the caramel remains smooth and chewy, and the nuts retain their satisfying crunch. Every spoonful offers a perfect harmony of sweet and nutty flavors.
Recipe 5: Mocha Almond Milk Ice Cream
Mocha almond milk ice cream brings together the boldness of espresso and the richness of cocoa for a plant-based dessert that feels like a coffeehouse indulgence. This dairy-free version perfectly balances coffee and chocolate, delivering a creamy and satisfying treat without overpowering either flavor. As with any great ice cream recipe, achieving the right texture and flavor requires careful attention to temperature and ingredient preparation.
Coffee and Chocolate Base
The secret to a standout mocha ice cream lies in the quality of its coffee and chocolate. Freshly brewed espresso provides a more nuanced flavor than instant coffee, but either option works depending on your preference.
Ingredients for the Mocha Base:
- 2 cups unsweetened almond milk
- 1/2 cup full-fat canned coconut milk
- 1/2 cup freshly brewed espresso, cooled to room temperature
- 1/3 cup unsweetened cocoa powder
- 2/3 cup granulated sugar
- 2 tablespoons almond butter
- 1 teaspoon vanilla extract
- 1/4 teaspoon xanthan gum (optional)
- 1/8 teaspoon sea salt
Start by whisking the cocoa powder with a small amount of almond milk to create a smooth paste. Gradually add the rest of the almond milk, coconut milk, and cooled espresso. Cooling the espresso beforehand is crucial to maintaining the mixture's texture.
Next, whisk in the sugar, almond butter, vanilla extract, xanthan gum (if using), and sea salt until the mixture is smooth. The almond butter not only deepens the nutty flavor but also enhances the creaminess of the base. Chill the mixture for at least 4 hours before churning for the best results.
For a caffeine-free version, simply swap out the espresso for decaf coffee - this won't compromise the overall flavor profile.
Balancing Sweetness and Mix-Ins
Once your base is ready, it’s time to fine-tune the flavor and texture. A pinch of salt can bring out the chocolate and espresso notes, while sweetness can be adjusted with a tablespoon of maple syrup or a few drops of lemon juice, depending on your taste preferences.
If the ice cream turns out too bitter after churning, a bit of maple syrup or coconut nectar can balance it out. On the other hand, if it feels overly sweet, a few drops of lemon juice can add just the right touch of acidity.
Mix-In Ideas for Added Texture:
Mix-ins not only enhance the texture but also elevate the visual appeal of your ice cream. Here are some great options:
- Mini dark chocolate chips: Add 1/2 cup during the last 2 minutes of churning for bursts of intense chocolate flavor.
- Cacao nibs: Perfect for a subtle crunch and deeper chocolate flavor without extra sweetness.
- Toasted sliced almonds: Toast 1/3 cup in a dry skillet for 2–3 minutes until golden and fragrant. Let them cool completely before folding them into the churned ice cream.
- Brownie chunks: Cut day-old brownies into 1/2-inch pieces and fold them in during the final minutes of churning for a chewy, decadent addition.
Assembly and Freezing
After churning, quickly fold in your chosen mix-ins. Transfer the ice cream to a chilled container and press a piece of plastic wrap directly onto the surface to minimize ice crystal formation. Freeze for at least 4 hours before serving.
The result? A dessert that's both sophisticated and satisfying. The bold coffee provides a lively kick, while the chocolate adds richness and depth. Every spoonful delivers a creamy almond milk base, perfectly balanced mocha flavors, and delightful bursts of texture.
Recipe Comparison
After diving into five different recipes, here's a quick guide to help you choose based on what each one brings to the table.
The Classic Vanilla recipe is perfect for beginners. It uses a short list of ingredients and an easy-to-follow method, showcasing the pure flavor of vanilla while letting the almond milk's natural nuttiness take center stage.
If you're a chocolate lover, the Chocolate Almond Milk Ice Cream is a must-try. It delivers bold cocoa flavors that complement the creamy almond base, creating a rich and indulgent treat.
For a fruity twist, the Berry Swirl recipe adds bright, tangy notes that pair beautifully with almond milk's subtle sweetness. The swirling technique not only enhances the flavor distribution but also makes the ice cream visually stunning.
The Nutty Caramel recipe is the most decadent option. With layers of homemade caramel and crunchy nuts, it offers a mix of textures and a depth of flavor. However, it does require a bit more time and effort to prepare.
Lastly, the Mocha recipe is geared towards those who enjoy a sophisticated flavor profile. The espresso balances the chocolate richness, creating a bold and warming dessert with a mature, refined taste.
The table below provides a quick comparison of these recipes based on key factors:
Comparison Table
| Recipe | Prep Time | Total Ingredients | Flavor Profile | Texture | Storage Life | Difficulty Level |
|---|---|---|---|---|---|---|
| Classic Vanilla | 15 minutes | 6 ingredients | Mild, sweet, nutty | Smooth, creamy | 1–2 weeks | Beginner |
| Chocolate | 20 minutes | 7 ingredients | Rich, cocoa-forward | Dense, creamy | 1–2 weeks | Beginner |
| Berry Swirl | 35 minutes | 9 ingredients | Fruity, tart-sweet | Light, swirled | 1 week | Intermediate |
| Nutty Caramel | 45 minutes | 11 ingredients | Sweet, nutty, complex | Rich, chunky | 2 weeks | Advanced |
| Mocha | 25 minutes | 8 ingredients | Bold, coffee-chocolate | Smooth, intense | 1–2 weeks | Intermediate |
As discussed earlier, the choice of ingredients impacts both texture and storage life. Recipes with higher fat content, like those using coconut milk or nut butters, tend to have creamier textures and longer shelf lives. On the other hand, options like the Berry Swirl, which contain more water, are prone to forming ice crystals, resulting in a lighter, icier texture.
Almond milk ice creams generally lean towards being icier compared to those made with coconut milk. Recipes like Nutty Caramel and Mocha, with their added fats, help counteract this tendency, resulting in smoother textures.
Calorie counts can vary widely depending on the ingredients used. Richer recipes, with added fats or caramel, naturally pack in more calories, while simpler options like Classic Vanilla tend to be lighter.
Conclusion
Making almond milk ice cream at home is a straightforward and rewarding experience. What makes these recipes stand out is how easy they are to tweak - you can adjust the sweetness, try out different flavor combinations, and skip the processed oils, artificial flavors, and preservatives entirely.
"When you consider value for money, making your own wins hands down every time. Instead of paying for expensive water or low percentage of almonds, when you make your own you know you're drinking quality", says Live Love Nourish.
These recipes cater to all tastes, from the simple yet timeless Classic Vanilla to the rich and bold Mocha option. Each one delivers a creamy, satisfying texture and a flavor profile that feels indulgent yet wholesome.
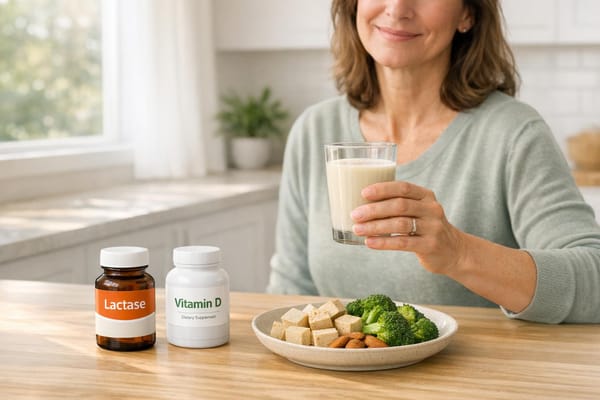
Customizing your ice cream not only enhances the experience but also gives you the freedom to enjoy occasional dairy-based treats without worry. For those moments, milktab's triple-enzyme lactase pill can help. Its compact formula supports digestion effectively, as customer Christina explains: "One tablet does the work of six Lactaid pills, and the extra enzymes cover everything the other brands miss. Good stuff".
Start with the Classic Vanilla and let these recipes guide you toward creating dairy-free frozen desserts that rival anything you'd find at a restaurant.
FAQs
How can I make almond milk ice cream creamier without using dairy?
If you’re aiming for a creamier almond milk ice cream without using dairy, consider incorporating stabilizers like xanthan gum or guar gum. These ingredients work wonders by thickening the mixture and creating a smoother, silkier texture.
Another handy trick is adding a splash of alcohol, like vodka. This helps lower the freezing point of the ice cream, which reduces iciness and makes the final result creamier. With these easy tweaks, you’ll have a dairy-free dessert that’s rich, smooth, and perfectly scoopable!
How can I adjust the sweetness in almond milk ice cream recipes?
When making almond milk ice cream, you can tweak the sweetness to suit your taste. Before freezing, sample the mixture and slowly mix in your favorite sweetener - whether it’s sugar, honey, or agave syrup - until it’s just right for you. This gives you complete control over the flavor. If you’re aiming for a lower-sugar option, try natural alternatives like stevia or monk fruit, but use them sparingly since they’re quite potent. A little adjustment can make a big difference!
What are some good alternatives to coconut milk in these recipes for those with allergies?
If coconut milk isn't an option due to allergies, there are several other plant-based milks that work well in almond milk ice cream recipes. Some popular choices include almond milk, soy milk, cashew milk, oat milk, and rice milk. These alternatives are easy to find and can help you whip up creamy, dairy-free ice cream.
Among these, almond milk and soy milk stand out for their smooth texture and mild flavor, which makes them adaptable for a wide range of recipes.